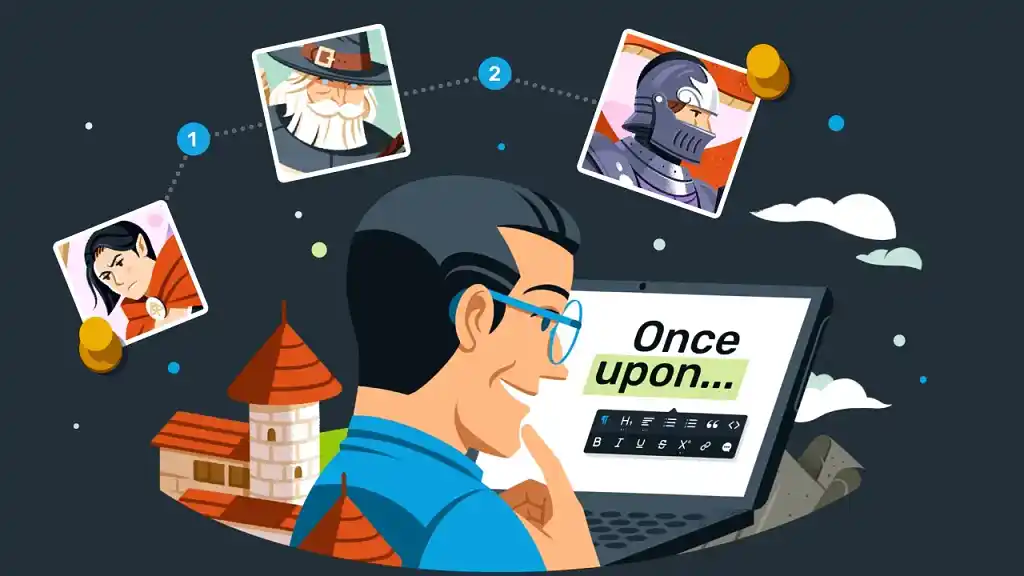
Writing is like weaving. First, you plan your design, calculating the type and amount of yarn required. Then, you load up your equipment with the necessary colors and lengths of threads. You pull a series of threads together and stretch them taut to define your work’s form and shape. This is the warp. Then you shuttle back and forth in a perpendicular direction with more threads over your warp. This is the weft, the repeating colors and designs that make your work unique and substantial.
You can weave, or write, by hand, as craftspeople have done for centuries, painstakingly and laboriously creating beautiful artifacts. Or, you can take advantage of technology, and use computers to help you manifest your vision into reality. You can use a computer to help you calculate elements, identify (or avoid) mistakes, make changes in your design and work more quickly and efficiently.
There are myriad programs and apps out there for writers. The best ones fulfill the function of a virtual loom, providing a solid framework around which you can weave your magic. Writers need a rigid support structure that will sort and stretch initial themes and plotlines (the warp). The loom also needs to provide space for the endless back and forth of writing and rewriting, the layering in of textural detail (the weft).
For me, for the process of writing long-form fiction, Literature and Latte’s Scrivener is the most useful virtual loom I have discovered to date. The software has its haters (it’s not exactly intuitive) but it also has a rambunctious army of supporters. The Internet is awash with “How-To” articles, extolling its virtues and explaining the nuts and bolts. If you have a question about a technicality, Tweet it with #Scrivener, and an enthusiast will rush to your aid – that’s not what this article is about.
Instead, I’d like to share some of the broader lessons I’ve learned using Scrivener, not the way you click on x to achieve y, but how you can use the framework it provides to improve the quality of your content. Just as computerized looms allow the weaver to complete more elaborate designs more quickly, Scrivener can help you weave your narrative onto a bolder, richer tapestry more easily than if you work in a regular word processor.
Structure Becomes Second Nature
Scrivener opens to a screen divided into three columns. The left column is the Binder, a file manager used to organized all the different elements that go into your work. In virtual loom terms, this is the warp beam, the place where you arrange your structural elements. From here, you can extend them through your narrative, but they have a fixed starting point.
When you first start using Scrivener, you may find this column seems a bit unnecessary and distracting. Why do I need to see how all my individual text files are arranged? Simply, it gives you a greater, ongoing awareness of the structure of your work. Because this column is always there, on the left side of your vision, over time you’ll start paying attention to your base organization. Without clicking on another window, or worse, diving into different software, you can see where you are in your story at a glance. That Binder column seeps into your subconscious.

This helps you avoid structural imbalance and keep control of your pacing. If you want to pay attention to crucial turning points within your narrative you can mark the chapters containing them with a colored flag (Right/Option click on the chapter icon >> Change Icon >> then take your pick from the list). Otherwise, you can still pinpoint whether or not your Act One is running too long, if you have become completely mired in an endless Act Two, or if you got so engrossed in the fight and chase sequences of Act Three that they now take up two thirds of your book.
If you’re an assiduous outliner, this column is a gift. You can build your structure, then set ongoing targets for your daily/weekly word count. Scrivener will do the math for you (top menu Projects >> Show Project Targets), enabling you to set realistic goals and deadlines.
If you’re more of a pantser, or like to work in a non-linear fashion, this column also benefits you. You can start by generally mapping the different phases of your story with folders, and then filling in chapters in whatever order you want. The Binder lets you retain an awareness of your general structure, while you fill in the gaps as the wind takes you. Nonetheless, with the Binder as your constant companion on the left side of the screen, you won’t get lost.
Either way, every time you open your Scrivener project, you see the structure. It nestles there while you’re typing. It becomes part of your habit, integral to the way you think about organizing and moving around in your work, the invisible warp supporting the fancy weft patterns in your overall weave.
The Iceberg Stuff
You can store anything you like in the Binder. You organize the main narrative inside one folder, but there is also space for all the other bits and pieces you need to support your story: timelines, character notes, photographs, maps, location sketches, research, fact sheets. This is the iceberg stuff, 9/10 of which may never appear on the pages of the book, but instead lurks beneath the surface, adding depth and substance to your storytelling. It’s great to have it all to hand, just a single click away within the same overall window as your writing.
Writers love research. Some of us love it too much, using it as an excuse to click out of what we’re doing and dive down a rabbit hole, emerging hours later with no idea why we went there in the first place. Scrivener helps you sidestep that pitfall. Separate research and writing time by gathering material into your Binder before you start work.
Once you start writing, and need to make a quick reference, e.g. to an evocative image you'd like to describe in some detail, the Split Editor lets you keep your cursor in your text, while opening up your source material in a window below.

To split the central pane, click on the icon in the top right hand corner.

You can then choose the document you want to appear in your second screen by selecting the document title on the top left, and Go To. Alternatively, you can get to this via top menu View >> Layout >> Split Horizontally (or vertically, if that's how you roll).
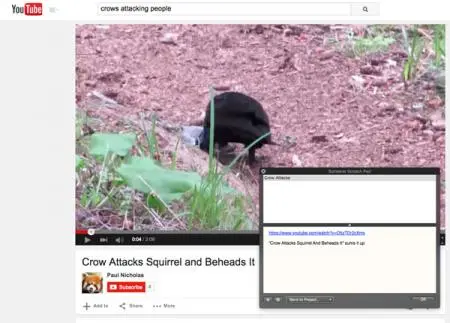
If you want to make notes (e.g. when watching a YouTube video) to add to your research, you can use the Scratch Pad. This is a floating window that allows you to make notes whenever you do venture outside Scrivener, and send them directly back to whatever project you’re working on. Go to top menu Window >> Show Scratch Pad to make this useful device appear.
The benefits of having all your material within the same main window, easily referenced, are enormous, especially if you’re working on a laptop with a small screen. Rather than cycling through different windows to get the information you need, risking eternal distraction, you can stay on track by having everything at your fingertips. It may also help to refer to the same information consistently, rather than bouncing back to the top of Internet research results (which may change over time) whenever you want to fact check.
This set-up also encourages you to think of work done on your supplemental material (those character questionnaires, location histories, family trees, evil corporation mission statements etc) as moving forward on your project, because it’s all contained within the same Binder. You can even include it in your daily word count. It’s good to flesh out your story in this manner, perhaps on the days when you’re not so sure where the main narrative is heading but you want to keep writing anyway.
Full Screen Composition Mode
You can research, plan, organize and structure all you like, but until you start weaving your sentences through the warp all you have is a handful of string. The central pane of Scrivener is where you create text documents, the main fabric of your work. However, you may not want the distraction of those three columns and all the whistles and bells when you’re getting down and dirty with your narrative, when you’re wallowing in the primal ooze of pure creation. That’s where this magic button comes in.
 Full Composition Mode (which can also be entered via top menu View >> Enter Composition Mode) gives you the basics, a plain white screen backed by black, on which you type words. The black background obliterates all other software you might have running in the background, all those tempting toolbars that peek out and entice you away from your work. If you want to pound away putting words on the page, just as if you were working on a typewriter (except with spellcheck, thesaurus, and less tendency to break nails or get your fingers jammed between the keys), then this is the mode for you. If you enjoy brainstorming, writing bursts, or writing till your eyeballs bleed then you’ll also savor the purity of this mode. If you’ve never tried those techniques, you might be surprised how many words you spew when there’s nothing else taking up space on your eyeline.
Then, when your ejaculation has ceased, you can go back to the broad view, and figure out exactly where what you just wrote fits within your grand schematic.
Non-Destructive Editing
If you make a mistake when weaving IRL, you have to undo your work, cursing, and do it all over again. Fortunately, the virtual loom provided by Scrivener saves you the heartache, operating according to the principle that you never want to get rid of anything: the Binder has its own Trash bin, saving anything you delete in frustration for potential rescue on a future date.
 You can save versions of each of your documents (e.g. chapters) in a more methodical fashion, using the SnapShot tool. This is found on the bottom of the right hand column, the icon that looks like an old-fashioned camera.
Clicking on this gives you the Snapshot option for the third column – various other editing tools such as comments and keywords will come up when you click the other icons in this row. At the top of the column, you’ll see previously saved versions. You can take a snapshot of a chapter at any time, by clicking on the + (and being rewarded with a satisfying shutter noise – it’s the little things).
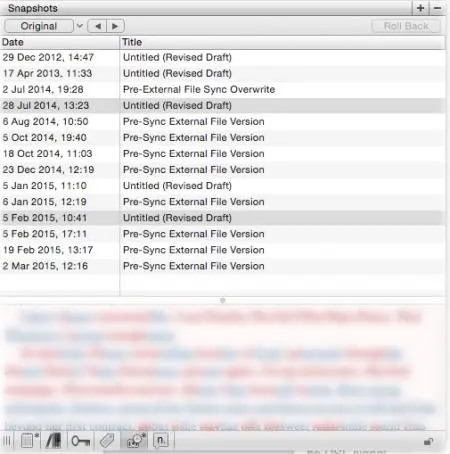
Once you have a number of different versions saved, you can Compare them (highlight both and click the compare button to see additions and deletions), or roll back to a previous version. You can set it (as I have) to automatically save every time you close Scrivener, and upload the new version to Drop Box.
This gives you the freedom to explore a range of possibilities, or go off on a radical tangent within your chapters. You’ve got nothing to lose. This sequence of Snapshots also allows you to see how your work and style are progressing over time.
Once you’ve saved your chapters as separate documents within your Binder, editing doesn’t seem like such a chore. You’re handling bite-sized pieces, in the order you choose, rather than attempting to work in a linear manner through a long document. Additionally, Scrivener keeps track of your overall word count via top menu Project >> Project Statistics.
Easy Output
Once you’ve written, your next goal is to be read. It’s time to remove your work from your virtual loom and send it off into the world. Scrivener helps smooth this process too, allowing you to Compile your precious tapestry into many different formats – and to introduce variations of your Compile if you want to test alternatives on readers.
When you’re ready to output, go to top menu File >> Compile. This lets you output your work in any format you choose, from a Kindle-ready eBook, to a traditional manuscript to a Final Draft screenplay (although you may need to do some tidying up on the other end). Pick the format that most suits your reader’s needs and the manner in which you want them to respond. For formal comments from an agent or editor (one who isn’t also using Scrivener), you can output to a Word document or PDF in manuscript form. However, you might want beta readers to have more of an authentic ‘reading a novel’ experience, which is where the Kindle format comes in. You may also want to look at your own work in a different format to the one you’ve been staring at for months and months – this will give you fresh eyes on the way it looks on the page.
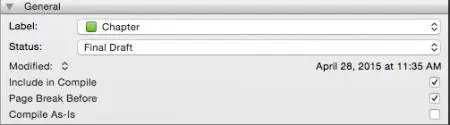
You can also introduce variations on your Compile without affecting the overall integrity of your work. You can test out those radical deviations you saved within Snapshot or create different versions of your masterpiece with a click on a check box. In the right hand column, in the Notes view (the first option in the toolbar on the bottom), you can choose to include or not include your current document in the Compile.
So, if you are unsure about a flashback, or sex scene, or a linked sequence of contrapuntal cutaways, you can see what the final piece looks like with or without them, without substantial re-editing on your part. In virtual loom terms, you can see the effect of making a set of threads one color or another. There are always several ways to tell a story, and Scrivener allows you play with the alternatives with minimal fuss and effort.
One day, artificial intelligence will be able to construct a whole narrative for you. Speak (or blink) a vague trigger (“A story about a woman who…”) into your machine and it will do the rest. Until then, software can offer writers a supportive framework, taking some of the pain out of the stuff computers are better at than humans, such as filing, counting, presenting on a screen and transferring to different devices. You choose the tools that coincide most with your creative technique – not every app is for everyone, and not everyone uses the program in the same way. If you’re a weaver by nature, you might find Scrivener helps your loom bear luscious fruit.

About the author
Karina Wilson is a British writer based in Los Angeles. As a screenwriter and story consultant she tends to specialize in horror movies and romcoms (it's all genre, right?) but has also made her mark on countless, diverse feature films over the past decade, from indies to the A-list. She is currently polishing off her first novel, Exeme, and you can read more about that endeavor here .